

Chia farming with a Raspberry Pi - Part 2, initial results
Assessing the initial results of building and running a Raspberry Pi Chia Farm.

If you've read the first part of this series, you'll have broadly learnt how to set up a Chia farming Raspberry Pi rig.
Whilst that post achieved everything I wanted it to in terms of what you need, how to set it up, and the broad final result, it didn't really cover day to day use of the set up, so I'll give a brief run down here.
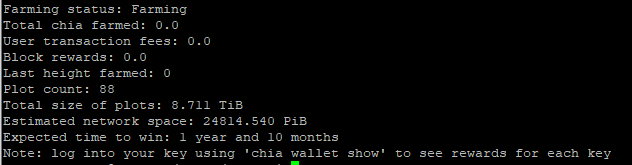
I'll start with some basic stats:
Basically... I've not been super dedicated in terms of actually plotting, the Raspberry Pi is actually incredibly slow to plot even with an M.2 drive, so I've been using other machines to plot in spare time onto a NAS, then migrating the files from the NAS to the Raspberry Pi attached drives via Cron job.
My current win time with 88 plots is 1 year and 10 months, whilst I know I don't have that many plots, that's still a nuts long time to get anything (think ROI at a minimum $700), and as I only had 2x 12TB drives with a total space of about 10.9TB each, I've almost filled half my space (conservatively I could hold maybe 200 plots).
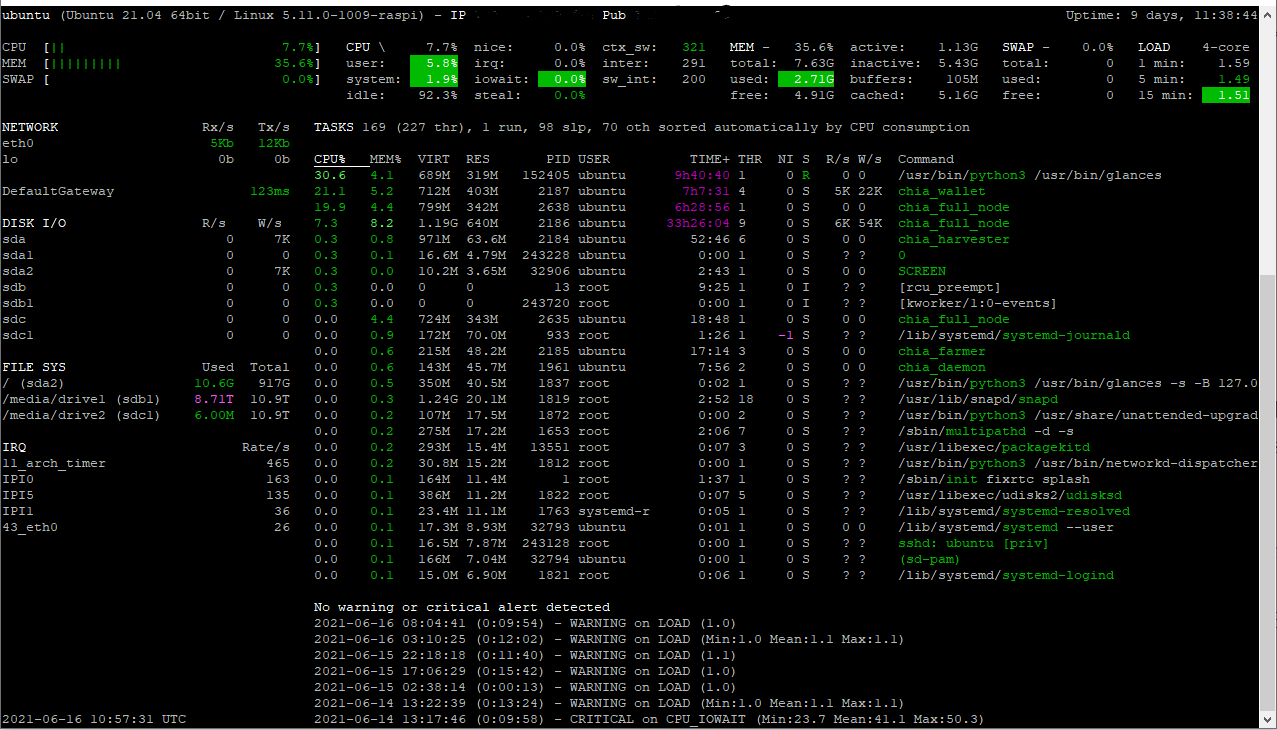
From the picture above, you'll notice a heap of WARNING on LOAD issues in Glances, a pretty sweet monitoring tool. Also the volume of HIGH CPU LOAD issues that pop up is quite large, and this is all without plotting.
Is it possible to plot on the Pi? For sure, totally is. Is it efficient to do so? Hell no, really slow, totally not what it was designed for, and using an external M.2 drive probably isn't giving the best throughput given its capped to a USB C port.
So where to from here? Well, I'll continue to plot up until the maximum purchased storage for the Pi, then just sit it running in a cupboard and forget about it, maybe check it once every 6 months to see if anything has been successful.
TLDR; Fun little project, but not really worth the investment to date. More later...


Comments ()